Homemade whipped cream is one of those simple pleasures that elevate any dessert from ordinary to extraordinary. With the right recipe and a handy whipped cream dispenser, you can create a light, airy treat that’s perfect for topping off everything from pies to coffees. This homemade whipped cream recipe for a dispenser is easy, flavorful, and a lot of fun to make. You don’t need any fancy skills or equipment—just a few basic ingredients and a bit of enthusiasm. Imagine your friends’ faces when you serve a dollop of your own fresh whipped cream. It’s a great way to impress guests or to treat yourself on a cozy evening at home. Let’s get started on this delightful and creamy adventure!
Why This Recipe Works
Homemade whipped cream is a simple yet transformative addition to desserts, making them irresistibly creamy and delicious. Using a whipped cream dispenser enhances the texture and ensures a fluffy consistency that is hard to achieve with traditional methods. This recipe leverages just three key ingredients, combining them in a way that optimizes flavor and performance in the dispenser.
Why You’ll Love This Homemade Whipped Cream Recipe for a Dispenser
This homemade whipped cream recipe is not only quick and easy, but it also allows you to customize flavors to your liking. Perfect for topping everything from pies to pancakes, it’s a delightful way to impress guests and indulge yourself. With just a few moments of prep, you will have a fresh, airy whip that elevates any dish.

Ingredients
- 2 cups (500 ml) heavy cream
- ¼ cup (30 grams) powdered sugar
- 1 teaspoon (5 ml) vanilla extract
Preparing Your Whipped Cream Dispenser

Combine the Ingredients
In a large measuring cup, whisk together 2 cups of heavy cream, ¼ cup of powdered sugar, and 1 teaspoon of vanilla extract until the mixture is smooth and well-blended. It’s important to achieve a nice balance; the sugar sweetens while the vanilla adds a lovely aroma.
Pour into the Dispenser
Carefully pour the whipped cream mixture into a clean whipped cream dispenser, ensuring not to overfill it. Overfilling can create messes or prevent proper gas distribution, so keep an eye on your measurements.
Charge the Dispenser
Screw the lid tightly onto the dispenser. Insert an N2O charger into the charger holder and screw it onto the lid. This will introduce gas into your mixture, creating that airy texture we love. It’s like a magic trick for your cream!
Distribute the Gas
Lay the dispenser on its side for 1 minute, allowing the gas to distribute evenly throughout the cream. Afterward, shake the dispenser vigorously about ten times to ensure optimal mixing. This step is crucial for achieving that fluffy texture that makes whipped cream so enjoyable.
Dispensing the Whipped Cream
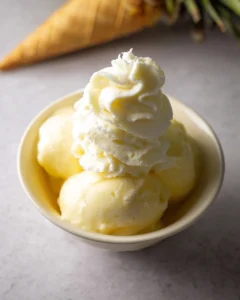
To dispense, hold the whipped cream dispenser upright with the nozzle aimed where you want the cream. Squeeze the trigger gently with medium pressure, and enjoy the fluffy whipped cream atop your favorite treats! It’s really satisfying to watch it come out perfectly.
Serving Suggestions
Consider serving your homemade whipped cream on classic desserts like pie, cake, and ice cream sundaes. It can also enhance breakfast favorites such as waffles and pancakes, or even lend a creamy touch to your afternoon coffee. The versatility is endless!
Tips for Success
- Ensure all equipment is clean to maintain the cream’s freshness and quality. Even a small residue can change the flavor.
- For best results, chill your whipped cream dispenser before use. A cold dispenser helps the cream stay whipped longer.
- Don’t be afraid to experiment with flavor extracts or toppings to make the whipped cream your own! A splash of almond extract or a sprinkle of cocoa powder can add a new dimension.
Variations
Try adding different flavorings with the base recipe, such as almond extract, cocoa powder for chocolate whipped cream, or a hint of citrus zest for a refreshing twist. You can even fold in a little cinnamon or nutmeg for a seasonal flavor. These variations can keep your whipped cream exciting!
Storage Tips
If you have leftover whipped cream, store it in the refrigerator inside the dispenser for up to 10 days. Ensure the nozzle is clean to prevent any unwanted flavors or contamination. It’s a perfect way to prepare for second servings without starting from scratch.
Pairing Ideas
Homemade whipped cream pairs well with fruit salads, chocolate desserts, coffee drinks, and even savory dishes like sweet potato casseroles for a unique flavor profile. The possibilities are truly endless!

FAQs
1. Can I make whipped cream without a dispenser?
Yes, you can whisk it by hand or use an electric mixer, but the texture may differ. While traditional methods work, they may not produce the same airiness.
2. How long does homemade whipped cream last?
Stored properly in the dispenser, it can last up to 10 days in the fridge. Just be sure to check for freshness before serving!
3. Can I use non-dairy alternatives?
Yes, non-dairy cream alternatives can work, but results may vary in texture and flavor. Coconut cream or almond whipping cream can make tasty options.
4. What can I do if my whipped cream doesn’t hold its shape?
Make sure to use heavy cream, and check that you’re using the right amount of sugar to stabilize it. Sometimes, a little extra sugar helps maintain the structure.
5. Can I add color to whipped cream?
Yes, you can gently fold in gel food coloring for fun looks while keeping the flavor intact. It’s a delightful way to get creative with your desserts!
Homemade whipped cream made with a dispenser not only adds an element of finesse to your desserts but also allows for creativity and personalization. With its light and airy texture, this whipped cream is perfect for any occasion. Whether for a festive gathering or a simple treat at home, having your own whipped cream on hand elevates the everyday dessert experience. Enjoy experimenting with flavors and serving suggestions, and relish the joy of this delightful addition to your culinary repertoire!
Print
Homemade Whipped Cream
This homemade whipped cream is light, airy, and adds a special touch to any dessert. Quick to prepare, it elevates pies, cakes, and coffees effortlessly.
- Total Time: 0 hours
- Yield: Approximately 2.5 cups 1x
Ingredients
- 2 cups (500 ml) heavy cream
- ¼ cup (30 grams) powdered sugar
- 1 teaspoon (5 ml) vanilla extract
Instructions
- Whisk together heavy cream, powdered sugar, and vanilla extract in a large measuring cup until smooth.
- Pour the mixture into a clean whipped cream dispenser.
- Charge the dispenser by inserting an N2O charger and screw the lid tightly.
- Lay the dispenser on its side for 1 minute, then shake vigorously about ten times.
- Hold the dispenser upright and squeeze the trigger to dispense the whipped cream.
Last Step:
Please leave a rating and comment letting us know how you liked this recipe! This helps our business to thrive and continue providing free, high-quality recipes for you.Notes
Ensure all equipment is clean for optimal freshness.
Chill the whipped cream dispenser before use for better results.
Feel free to experiment with flavors like almond or cocoa powder.
- Prep Time: 5 minutes
- Cook Time: No Cook
- Category: Dessert
- Method: Dispenser
- Cuisine: American
Nutrition
- Calories: 51
- Sugar: 1
- Sodium: 4
- Fat: 5.6
- Saturated Fat: 3.5
- Unsaturated Fat: 1.5
- Trans Fat: 0
- Carbohydrates: 1.6
- Fiber: 0
- Protein: 0.3
- Cholesterol: 15